Materials Used:
- stud finder
- 5 sheets 1/4 inch oak plywood (ripped into 8 inch pieces at store) about $30 each
- circular saw
- jig saw
- medium grit sand paper
- level (we used a longer 4 foot one and a 12 inch one)
- dremel tool
- nail gun (ours is a borrowed electric one)
- 1 1/4 inch brad nails
- measuring tape
- straight edge ruler
- pencil
- 4 nickels
- Earplugs
This tutorial is for all the folks out there who are super into details.There are loads of faux shiplap tutorials out there but a lot of them leave out important steps and that’s not cool.
All in all, installing the shiplap itself (minus any finishing work such as use of wood filler, sanding, priming, painting – that’ll be another post) took us about a month. YUP. That was with us working an hour to 90 minutes a night about 4-5 days a week. Why only at night? Because toddlers and nail guns don’t mix.
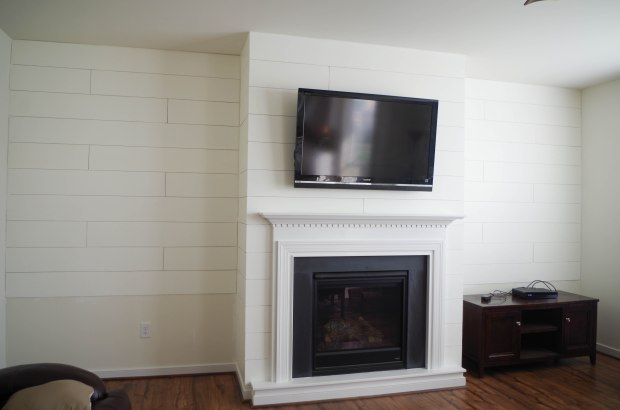
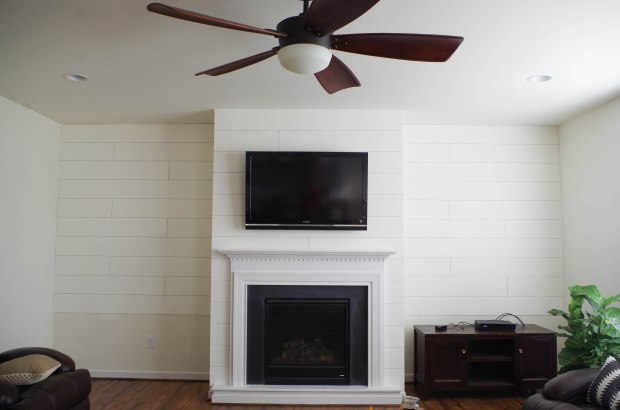
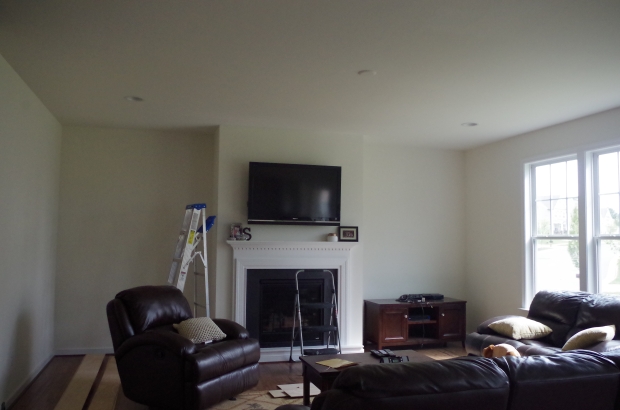
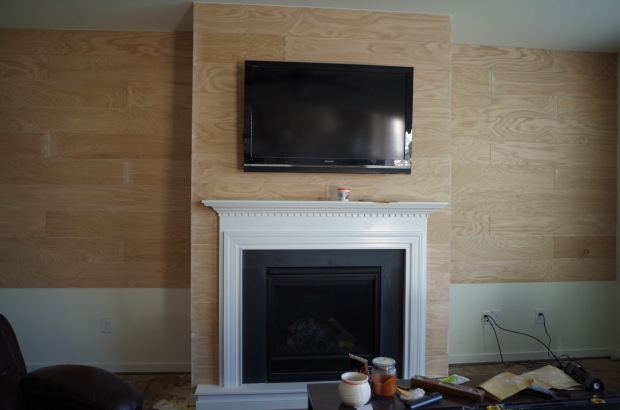
So here is our project. We wanted to install faux shiplap on the entire fireplace wall and jutouts as well as the walls behind where our built ins will go. The nice thing about knowing we would be installing bookshelves to the back walls was that we knew we didn’t need to be perfect at those corners or even line up straight to the next board. We did need to pay attention to those outward corners of the fireplace. Ideally, boards should line up straight with a perfect little nickel gap straight across the corner. Hahaha….
 So we began our project at Lowe’s. We did a little math (not so well) and we purchased 3 sheets of ~1/4 inch oak plywood and had an employee at the store cut the boards down to 8 inch strips. We later went back and got 2 more boards to finish the project. It cost us about $150 for 5 sheets.
 Other tutorials used 5.5 or 6 inch but I wanted some chunky 8 inch boards and we have 9 foot ceilings so I figured it could work. Also, real deal shiplap is 8 inches. The thing about real shiplap is it’s probably level across the top and bottom of the boards. The thing about getting plywood cut down is IT WILL BE UNLEVEL. And that was with some pretty special attention used to cut the boards by the guys at Lowe’s that helped us. Each board seemed to have a nice taper to it, especially near the ends. The other thing to consider is that each board will be a different width. No 2 boards will be the same and you’ll have anywhere from 7.5 inch to 8.25 inch width boards. This will mess you up because that perfect nickel gap you want will go to heck if you use 2 different width boards on a row. So in theory, you should use boards the same width across each row. The problem will be that you can’t always get it perfect. Sometimes you have to use a board that’s not quite what you need and then your spacing gets funky. And then on the next row you try to correct it by using a bigger/smaller board in that area which helps some but it still ends up looking off. Each 4’x8′ sheet of plywood will yield 5 full pieces of shiplap and a 6th piece that’s more narrow. This piece can’t be used except at the bottom of the project if you don’t need a full board.
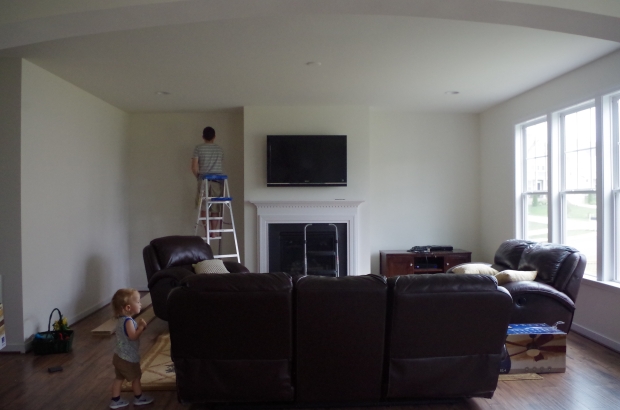
Prior to installation we took our stud finder and marked each stud on the wall for a few feet down from the ceiling. We then took a piece of our (unlevel :p) shiplap and connected the dots and drew a line from ceiling to floor. 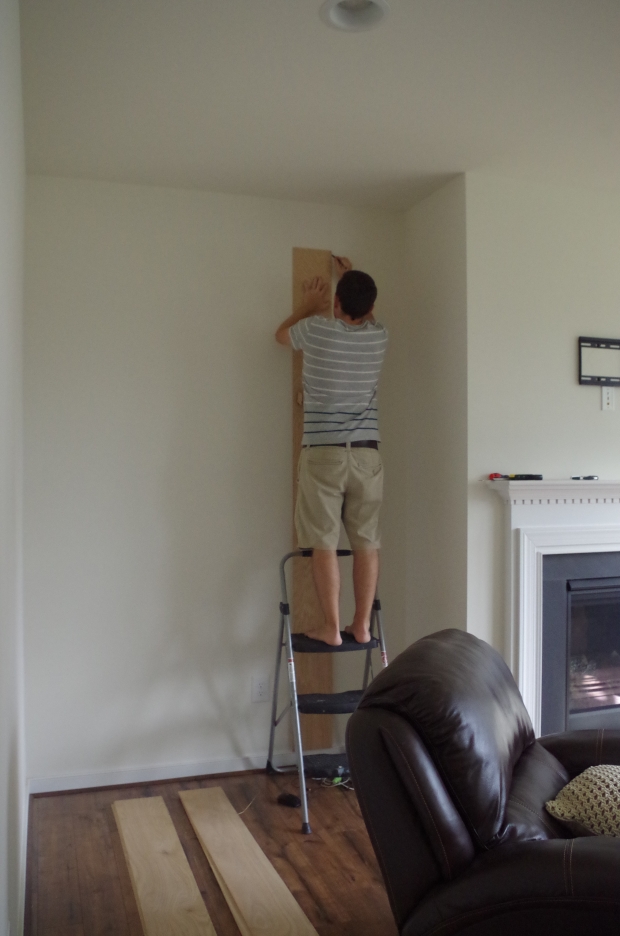 We realized this wasn’t completely necessary later on because you’ll be able to see where you’ve nailed into the other boards and will have a pretty good idea where your stud is, but it didn’t hurt.
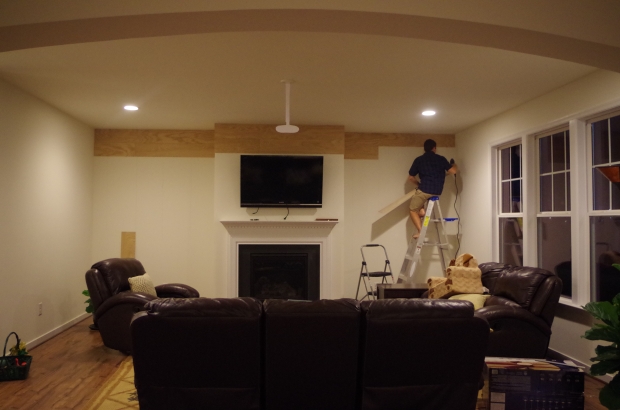
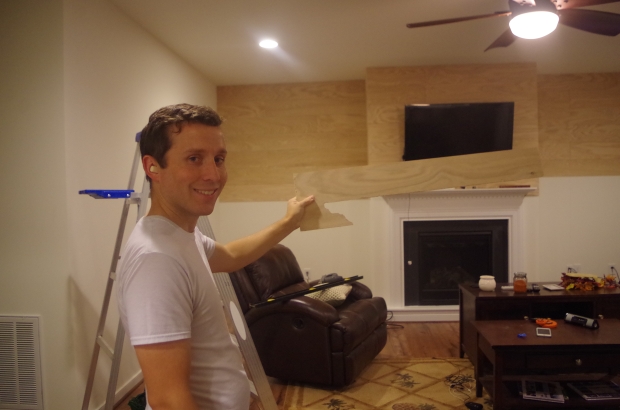
We began our project in the top left corner. We chose to start at the top because we wanted to have a full board at the top of the fireplace wall and didn’t care as much about having a full board at the bottom where there’s just a smidge of wall on either side of the fireplace. We had a suspicion that our ceiling would have some wobble to it so we did not put the first piece flush. We left about a 1/4 inch gap to the ceiling. Each section on either side of the fireplace is just over 72 inches wide. We measured 72 inches on a board and used our circular saw set up in the garage to trim it down. We brought our board in, sanded down all edges, left our 1/4 inch gap and used our wide level to sit the board on top of. Once we were level, we nailed in 3 nails down the board hitting each stud. As I said earlier, we weren’t concerned about having the ends of the boards go flush into the corners because we knew it would get covered up later by the bookshelves. Each of these planks got about 15 nails or more so if you’re thinking I can totally nail these up using a hammer don’t even think about it. Trust me.
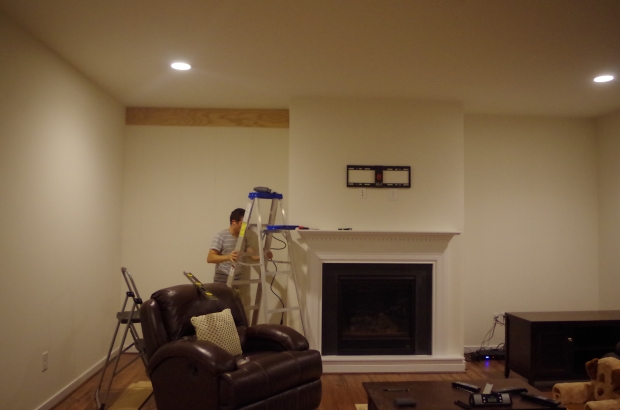 We then moved around the room, leveling up each board and nailing into the studs.
 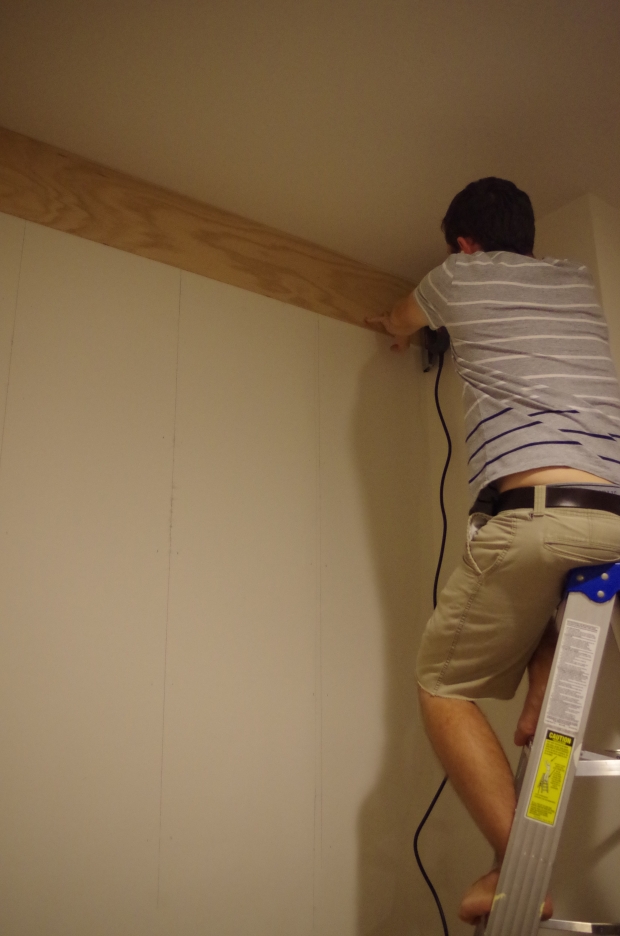 By the second board we had already eaten up our 1/4 inch buffer and were flush to the ceiling which was a little scary because we had a long ways to go to make it around the fireplace. Fortunately, it appears that most of the ceiling from that way on is pretty level. And even if it isn’t, we got the boards as close to the ceiling as we could while leveling them and shot them into place.
That first row was tricky because we both had to be up on ladders juggling the board, the level and the nail gun. It took us about an hour and a half to finish that first full row. The second row you now add juggling nickels into the mix. Because we used another 6 foot board across the top right wall, we were down to a 2 foot section. The problem with smaller sections is you don’t always have a stud nearby. We chose not to use wood glue/liquid nails although it would’ve been a good idea if we could’ve. Instead, we hit studs as much as we could and placed the wood on the wall to use it’s slight warp to our advantage. I honestly can’t imagine juggling glue in this process as well. There are a few areas where the wood isn’t completely flush to the wall but I’m hoping that adds character 😉 After the 2 foot section went up, we needed a 4 foot one. This is where it gets tricky because you’ll need 4 nickels – 2 to go on top and 2 to go on the side where it meets to the other board. There were a lot of dropped nickels… This is where being on ladders isn’t so fun.
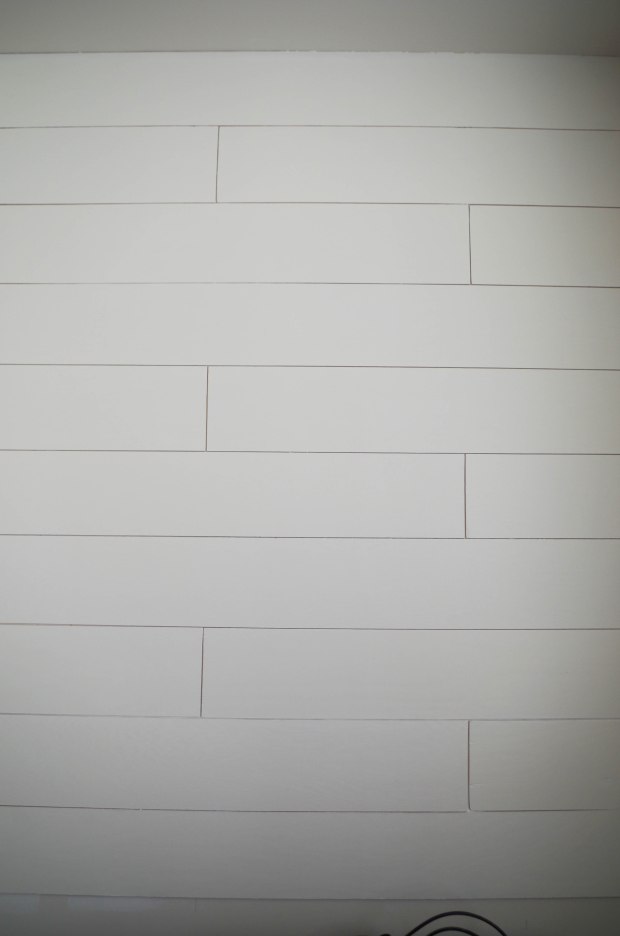
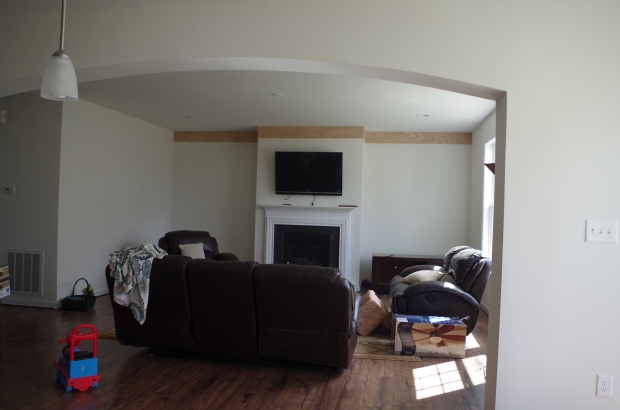
We wanted to use all of one board up and then move to the next like many tutorials we had read in order to give it a random feel. The problem with that was that we had a space that required some symmetry. 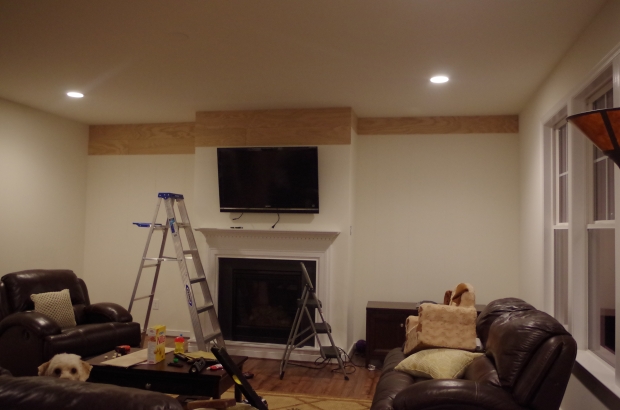 What happened on the left of the fireplace needed to match the right. Or if it was going to be random, it needed to all look random. Because most of our cuts were basically 6′, 4′ or 2′, a pattern emerged early on. Once we got to the tv rack, the pattern would’ve then got thrown out because we would then be making some different cuts. So what we did on the left would not match the right. If it had all been random, it would’ve looked good. But because the left was pattern and the right was random we thought it would look odd. So we decided to keep whatever we did on the left as what we did on the right.
A few times we’d put up a board and it would be level from the get go, but more often than not, it needed an adjustment. If the bubble went left, we’d take the nickel on the left and turn it to widen the gap slightly until we were level. Thus we sacrificed keeping the spacing consistent to keep it level. You can’t really tell but it becomes an issue when you go to meet up to the next board. 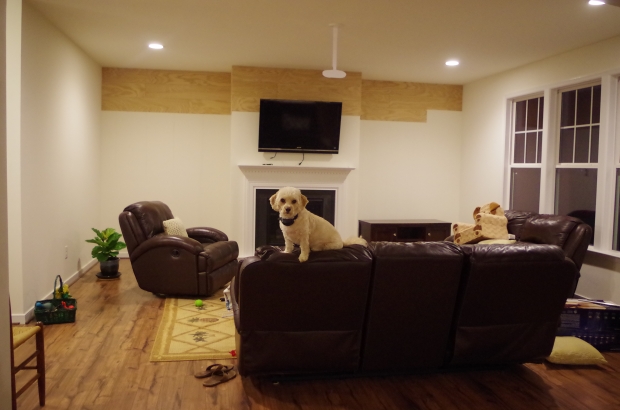
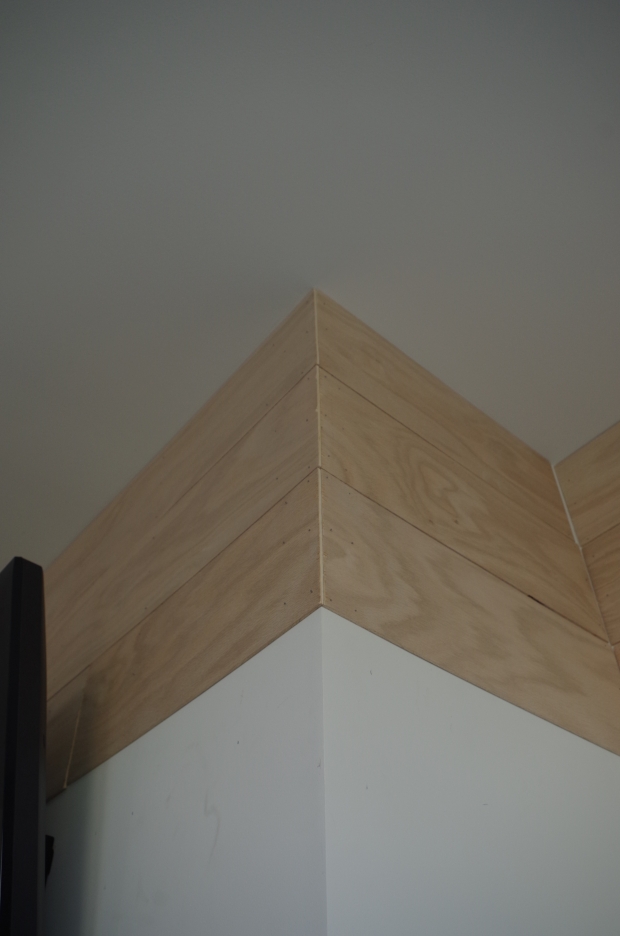
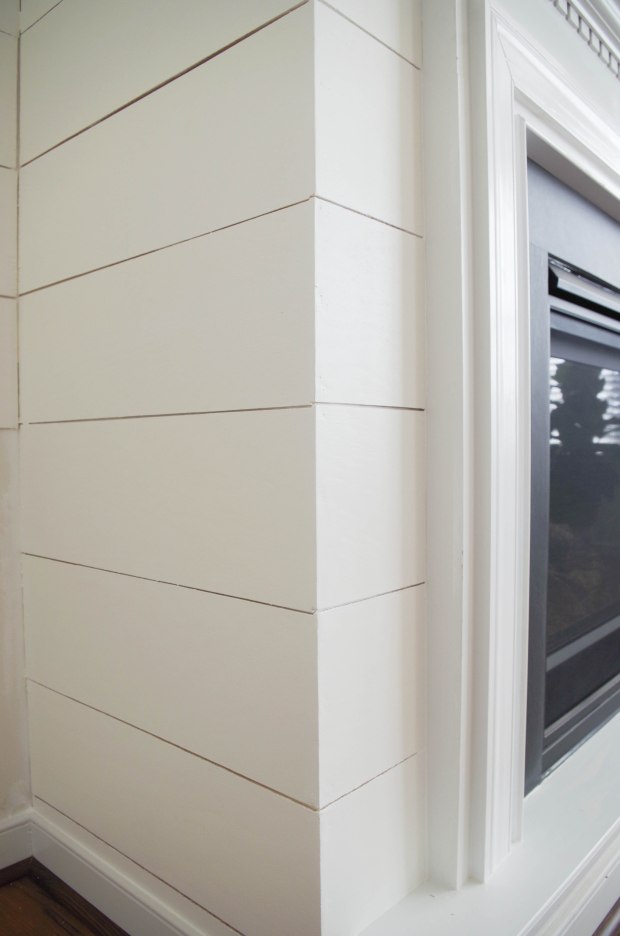
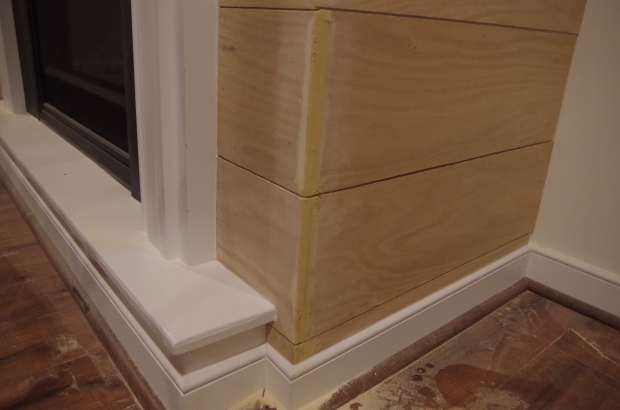
Here you can see we did not get snug to the interior corners. The outward corners we tried to get as close to perfect as possible. Wood filler will come in to save the day later. We chose not to miter plywood. It’s probably too thin and we don’t have a miter saw anyway. Instead we brought the boards on the side walls as close to the edge as possible and then cut the boards on the front of the fireplace a little longer to gap it to the edge. With the circular saw, the plywood gets rather chewed up on the ends. You can sand it, but the veneer does get ripped off the edges in some spots. We may fill it with wood filler or leave it. It’s likely once it’s painted it won’t be very noticeable.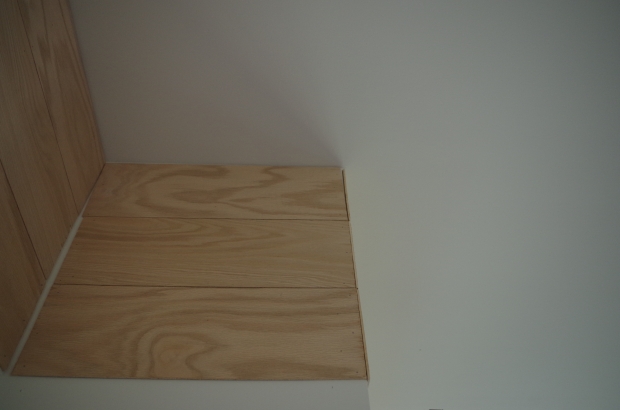
Yes, that top board is wonky. Thank you to whoever dry walled around the fireplace and laughed thinking, “No one will even notice this so I’m not even going to care if this is close to level”. Praying that wood filler can help us out there.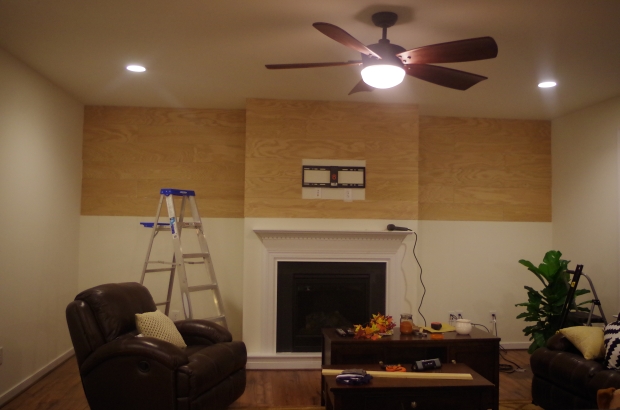
Oh, look…we got a fan. 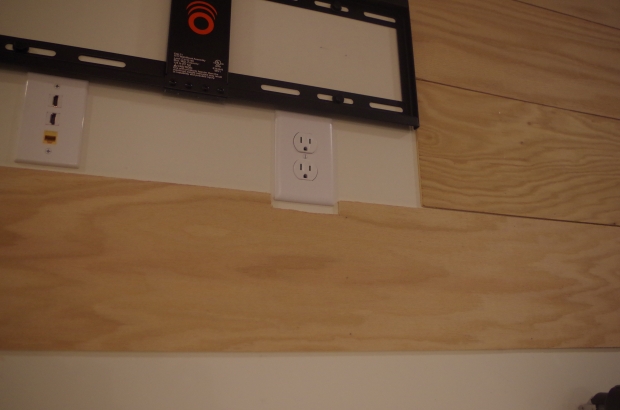 Yes, that spacing around the outlet is not our best work. But with the TV covering that board almost entirely we pretty much did not care enough to make it look any better.
Here you can really see how the boards get chewed up. I suppose we probably need a sharper blade but this is what we got. Also, you’ll see a few spots of wood that are painted white. This is a result of my 5 minutes of “I need to paint every edge of every board before we put it up” which quickly got dismissed because it was taking too damn long. If I could do it again, I would’ve painted the edges of every board before nailing them up (read more about that here).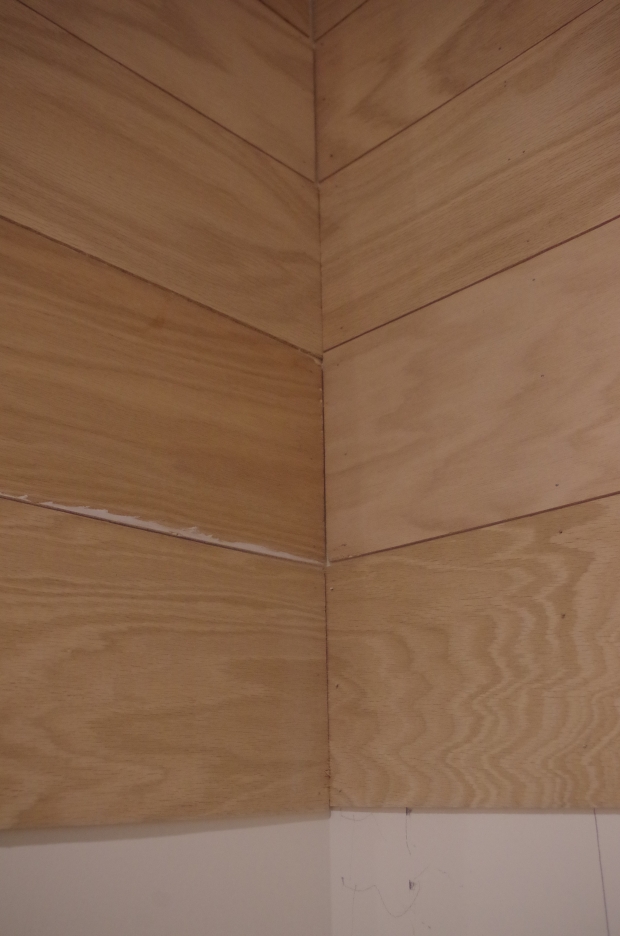
The height is off! We’ll try to correct it by using a fatter board underneath the one on the right. 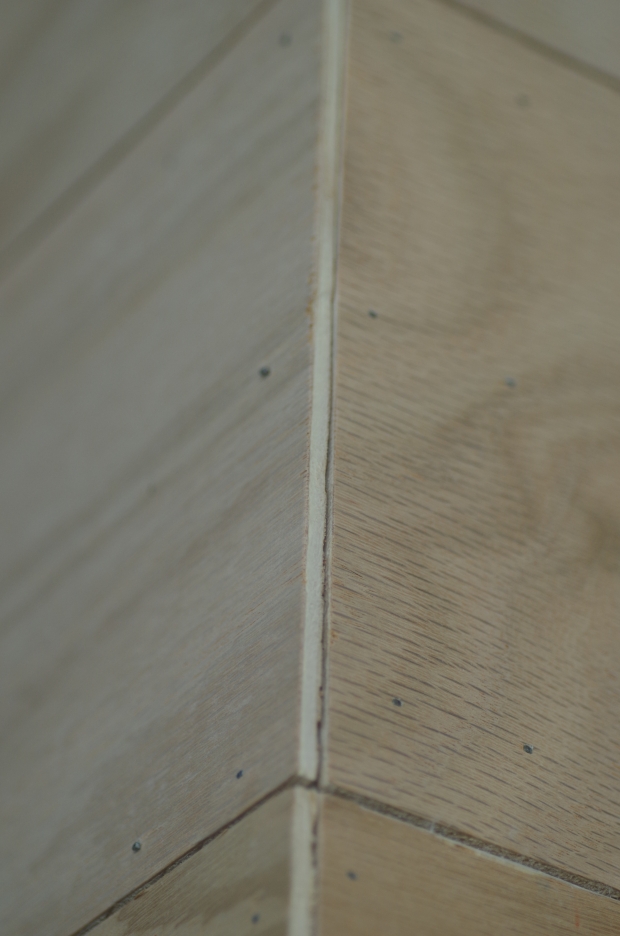
All along we were dreading the cuts around the mantel. When it finally came time, I had developed a plan. I took a sheet of paper and I trimmed with scissors around the left mantel holding the piece of paper about where the board would lay. This only took me about 2 minutes and is actually the easier part of the whole ordeal. I trimmed the edge of the paper where it would meet the board behind it. We made the decision to split the fireplace in the middle even though technically we were due for a 4’/2′ situation. So we measured from the end of the board to where half of the wall would come to. We drew a straight line down the board. We then needed to adjust for the cut out portion. We took our sheet of paper and lined this up with the left edge. We drew onto the board the area we would need to remove by following the edge of the paper. We extended the line all the way to the edge of the board to cut out for the full amount. We took the circular saw and cut down the board to the tricky area. We then took a jig saw and cut the other area out. We used my dremel tool to get all of the tricky areas that the jig saw couldn’t do too well. We held it up and guess what….it was too short. It fit, but the edge on the left was too far over to the right and exposed the piece on the short wall. Since this process took about 40 minutes we were about to chuck it in the trash and go to bed. But we randomly decided to flip the board over and try it on the right side. And it fit! It wasn’t perfect, but that wall is just slightly smaller on the right side and so it worked. 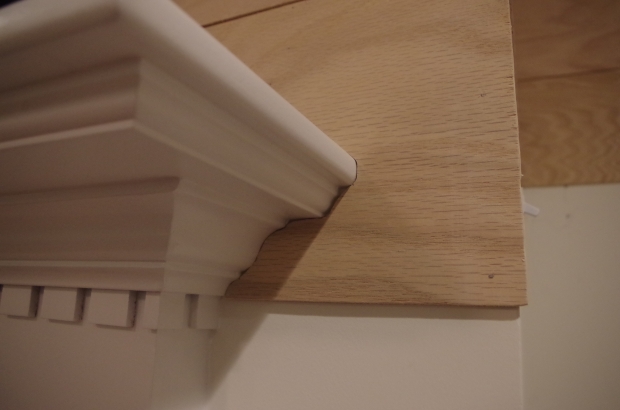 Then it came time to do it all again for the left side. This time we allowed more than enough space to the left of the board. Also we got rather good with the dremel tool the first time around so we used it mostly to make the intricate cut and the result is that the left side is just about damn perfect.
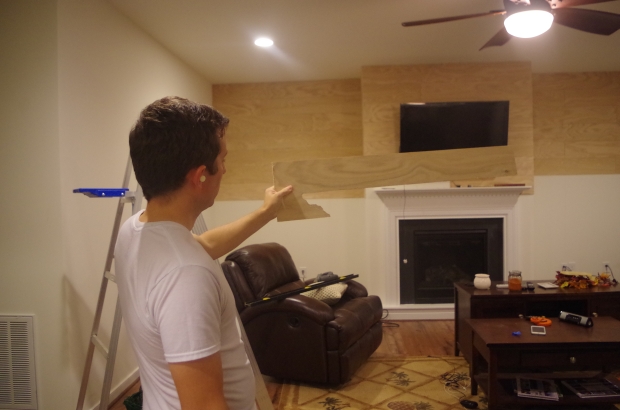
Yes we are super proud of this little piece of wood!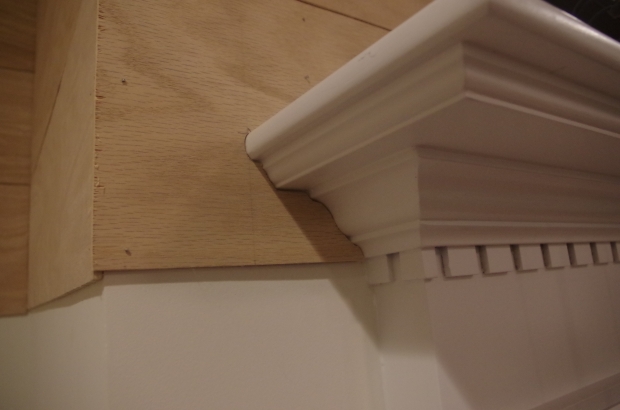
Because it was a bit lengthy on the left and left too much overlap, I took the dremel tool and sanded the edge down (once it was already up). You can sand the boards with sand paper but this really only removes the veneer of the board. The particle middle will remain so you’ll need a sander or dremel to get that portion to sand out.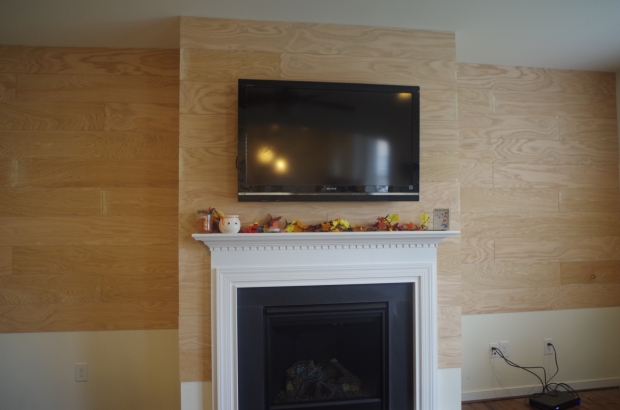
We marked on our built in walls 34″ up from the floor knowing that this would be about the size of our cabinets. The way it worked out, that left about a 2 inch space to the mark so we went ahead and put one more board on each side. 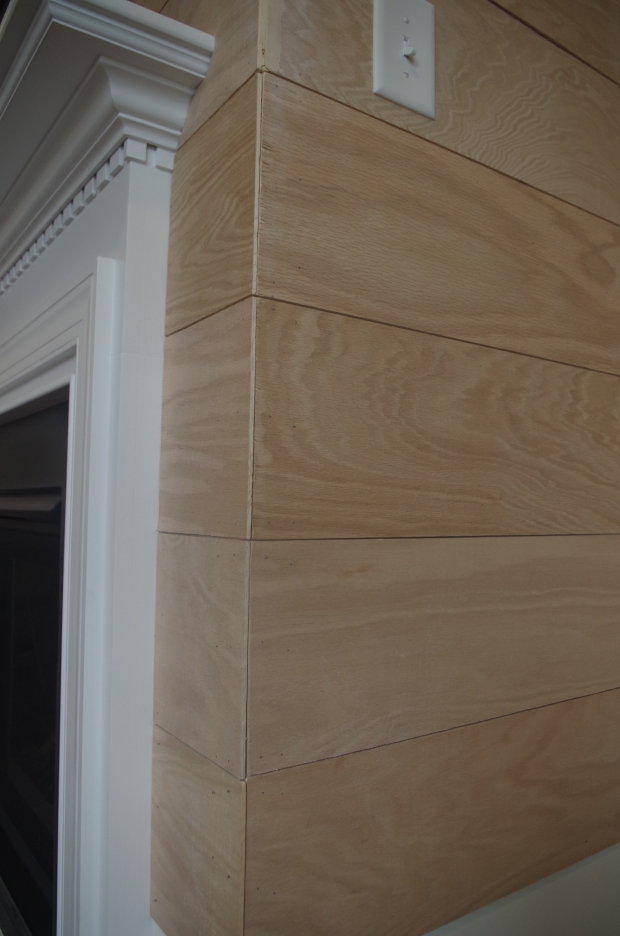
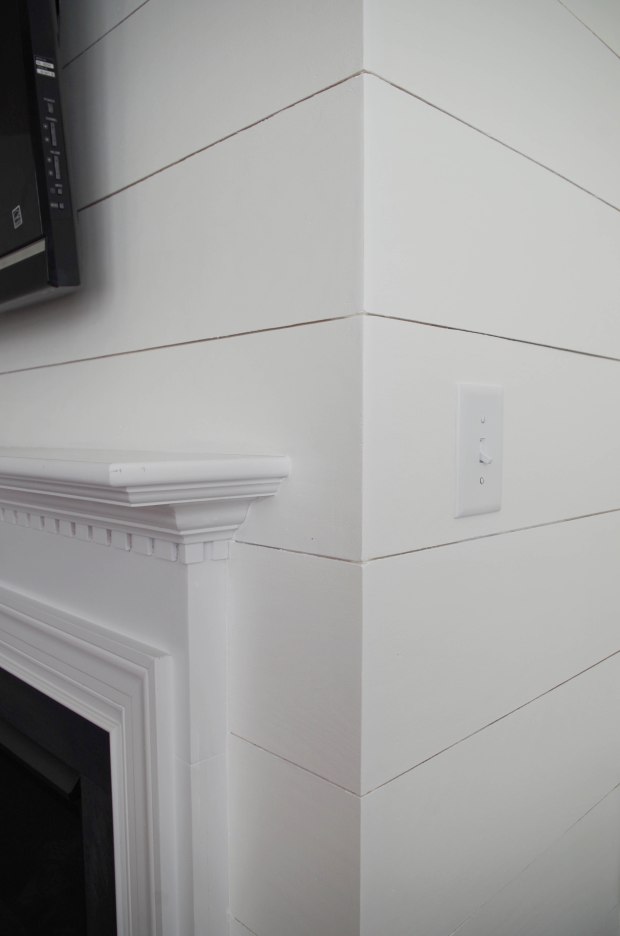
The side walls and fireplace front wall were taken to the floor because these will be exposed. In order to go around the fireplace switch we first removed the plate. We marked where the hole would be and used a drill to make a hole in the middle of our plank. From this we were able to insert the jig saw and make a rectangle. We used the dremel to get out the rest.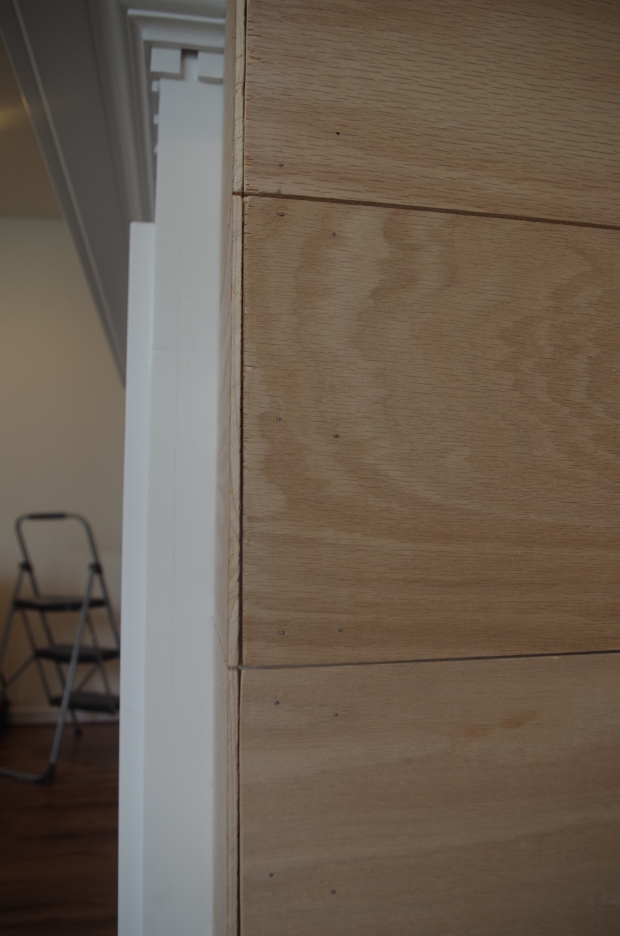
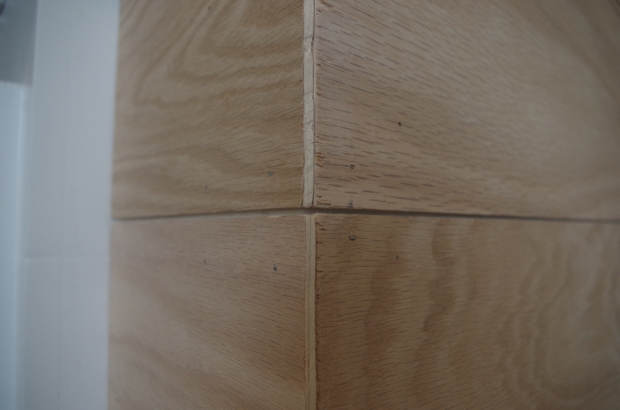
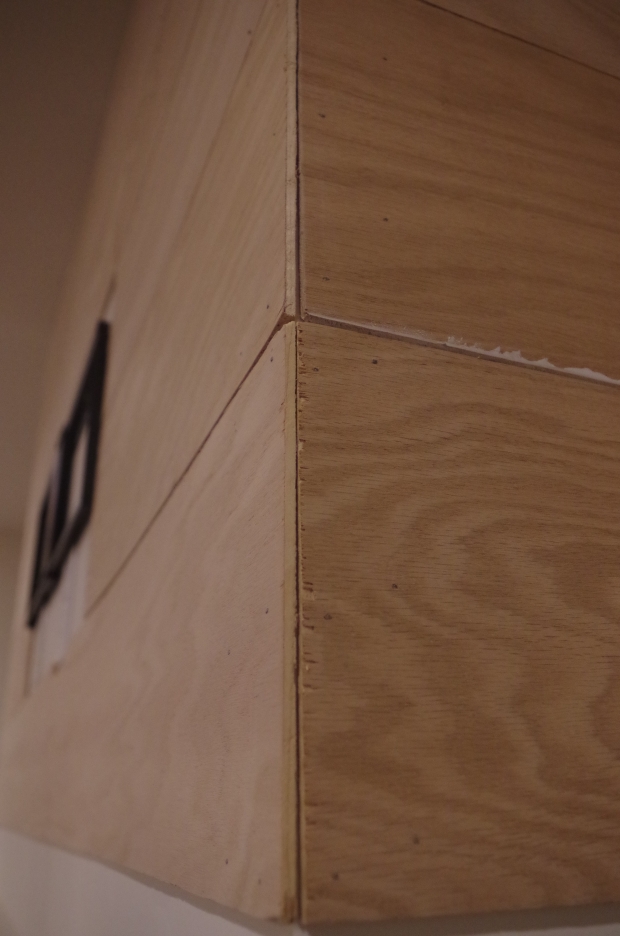
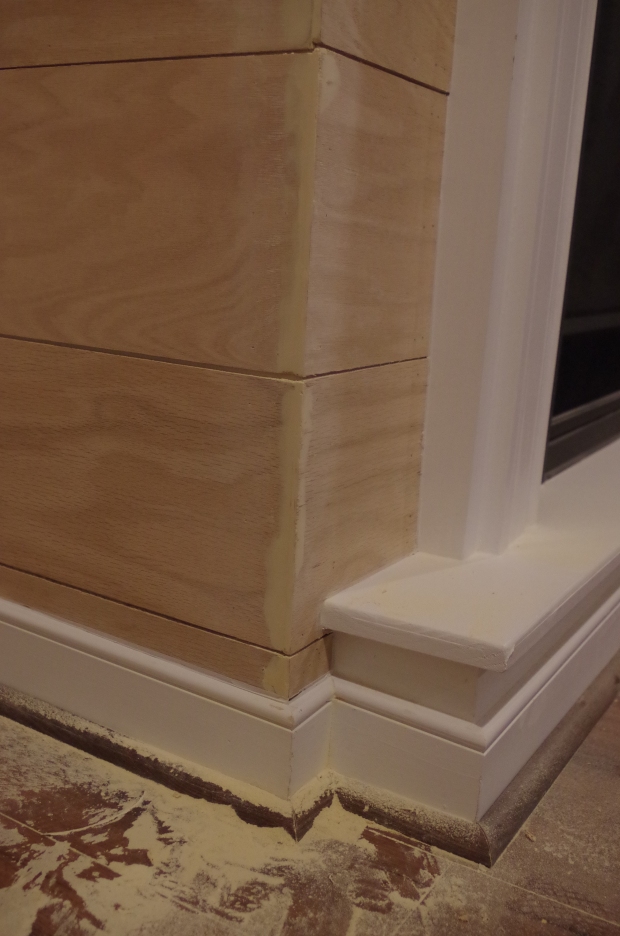
Some of the corners look awesome. You could stick a nickel in that right there!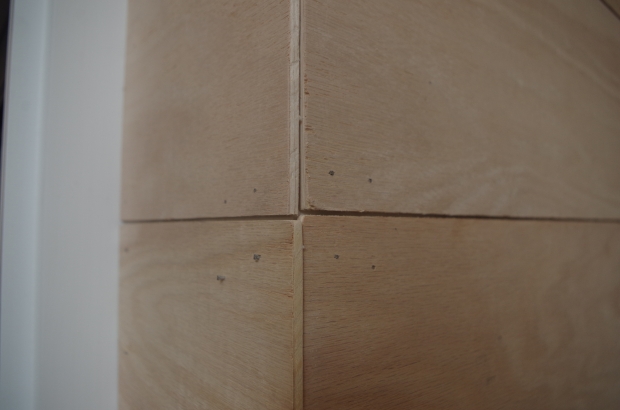
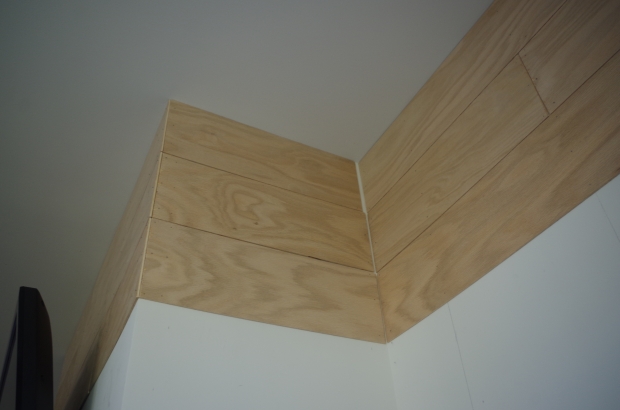
About half of the corners line up like this though 😦 No amount of board selection would fix it and so we’ll have to hope that no one gets too close. I’m hoping once it’s painted it won’t be noticeable.
It was a very tedious process which I wasn’t quite expecting given how easy some of the tutorials made it seem. Next up is using wood filler and caulk to smooth out the joints followed by lots of sanding and then painting everything white.
Check out Shiplap Part Two.

 I next caulked wherever my boards met the ceiling or base molding and around the fireplace. Caulking can be messy if you wing it. I recommend taping your area off. It’s more time consuming but results in a neat and tidy caulk line. Place your tape as close to the edge of the board and leave 1/4 inch gap at the other tape strip from the corner. Run a bead of caulk into the corner and then use a finger to spread the caulk. Once done, quickly remove your tape. In areas where there was a larger gap I had to go back and apply a second round of caulk because when it dried it left a bubbly gap.
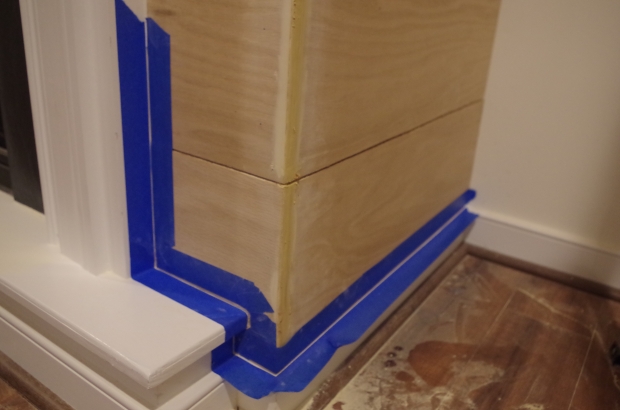
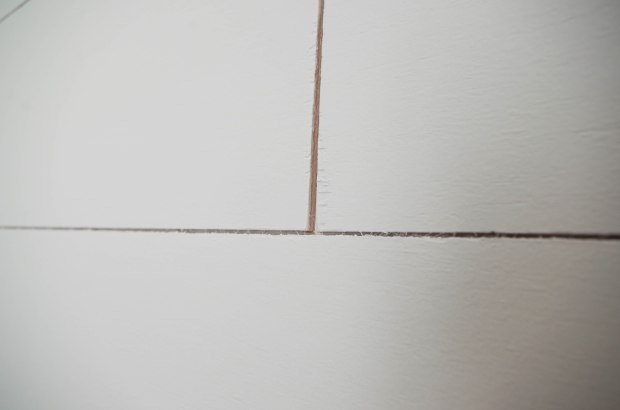 Because of the angle of each of these cracks it was really only evident on the fireplace wall and at the boards near eye level on the other walls. So I went in again with my trim brush – loaded it up and jabbed it into those cracks. I followed up with a toothpick to get out excess paint and my trim brush to smooth the paint out. But it was only maybe 30% effective at getting paint in there. So then Eric suggested my little art paint brush. I tried it and it worked much better. But still – we’re talking real slow because I’m literally taking a paint brush the size of your pinky finger to paint little by little into these cracks. So I hit the high spots – the fireplace wall and especially those corners which were the most apparent and the boards at eye level on the other walls.
 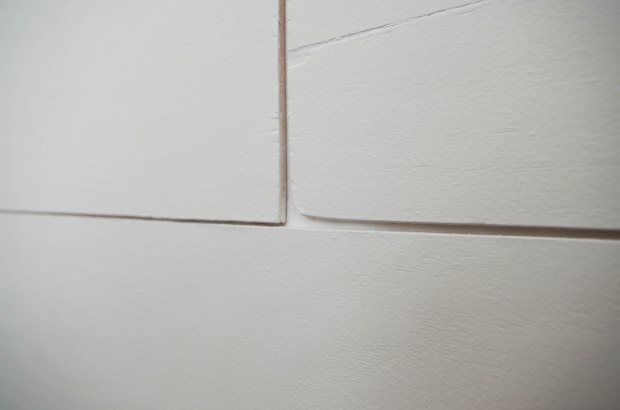 I then followed up with 1 more coat of paint on the entire surface. 2 coats was close but 3 coats looks better. EDIT: After about a month, I noticed the color of the white had yellowed significantly. It was as if the wood was bleeding through. So I painted another 2 coats of paint and that seemed to do the trick. 5 coats of paint – really? Yes, really…ugggh.